Revolutionary Pelmet box
Wednesday, September 25, 2013Okay, maybe "revolutionary" is an overstatement... But! I haven't seen one on Pinterest done this way. I've seen several posts for DIY Pelmet boxes or Cornice boxes, whatever you wanna call it. It's for the window and it looks pretty, okay? Anyway, I've seen some using boards and even some using foam core, but I've never seen anyone use cardboard!
 |
| Bam! |
 |
| Big, beautiful pieces of cardboard that I snagged from work. They were scheduled to be destroyed. ;) |
 |
| Most of my supplies. I added duct tape and Krazy Glue later. |
First off, I had to measure the existing plastic window casings. That thing at the top...
 |
| Don't you love my "apartment style" blinds. :P They came with the house. They originally had these gawd-awful white lace curtains over them. |
So I measured that, front and sides, totaled it up and went to measure out a piece of my cardboard to that length.
 |
| Marked it with a sharpie. |
 |
| Then used my handy dandy box cutter to cut the line. |
 |
| Used my first piece as a template to cut the other two. |
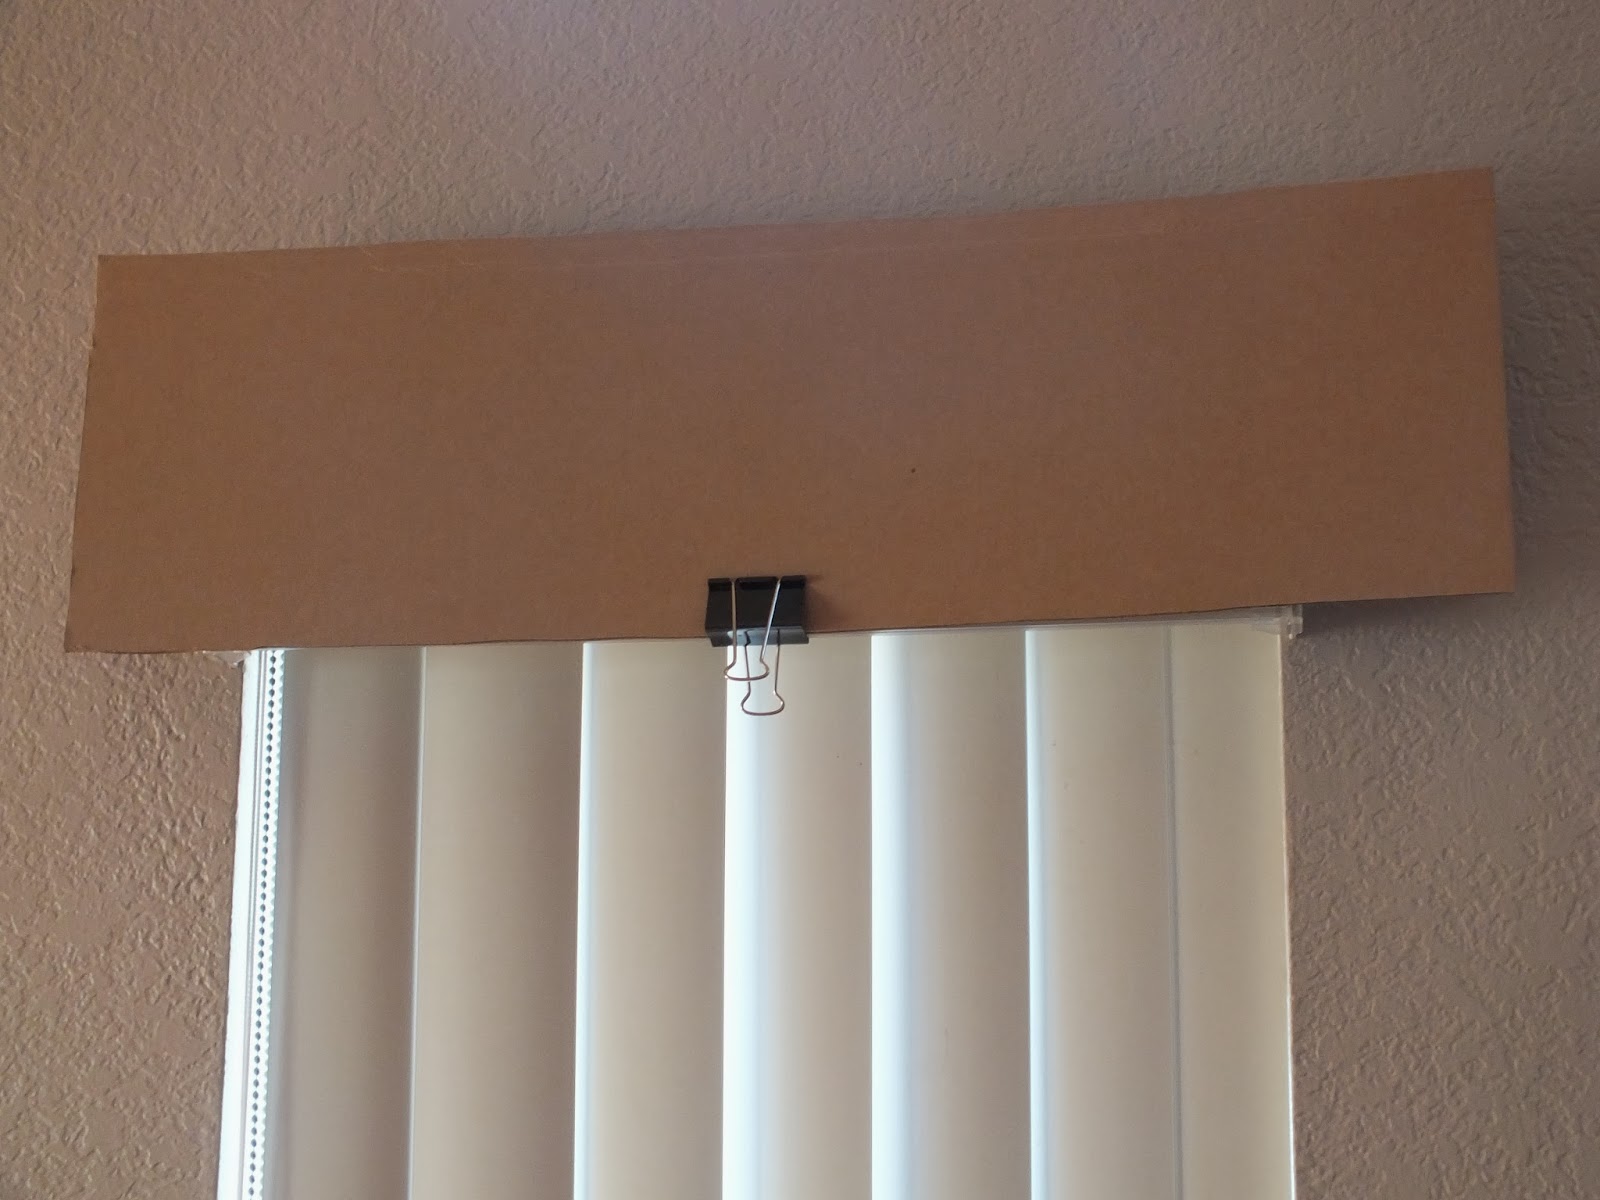 |
| It's tough doing projects by your self. lol Luckily I had this clip. I put it up to check that I liked the scale of it. |
 |
| Then I marked where my first bend would go. |
 |
| I put the level on the line so I would get a nice straight bend. I also lightly scored it with the box cutter so it would bend more easily. |
After that I put it back up to check the other side, mark it and cut off the excess cardboard.

 |
| Voila! Cardboard Pelmet box. |
Next step was to cover it with batting, then the fabric. I was probably a little impatient on these steps because I just couldn't wait to see the finished product. I'll show you what I did but note that I have a better idea for the future boxes. I forgot that I have this super sticky double sided tape that I will employ instead of the spray adhesive and duct tape. Man the back of this sucker is ugly! lol Luckily you don't see that when it's up.
 |
| I used the spray adhesive to attach the batting. I just sprayed the whole front of the cardboard and stuck it on. |
 |
| Then I laid it on the fabric and sprayed only the pieces of the fabric that would touch the back of the cardboard. I didn't want the adhesive to show through like I've had on other projects. It doesn't just dry it looks wet even months later. |
 |
| While waiting for the glue to dry I attached the sticky backed Velcro to the window. |
 |
| Then I thought that the adhesive wasn't enough so out came the duct tape. Classy, right? You can see the strips of the other side of Velcro attached to the folding parts. Those pieces don't come with sticky back so I used Krazy Glue to attach them. |
 |
| Then I popped that baby up there! |
 |
| Ah, much better. :D |
You probably can't tell from the photos but the sides wanted to... not pop off, but kind of fly out if you will, so I took it off and folded the bent parts in towards the back of the cardboard and left some weights on it over night so they would stay put. Worked much better this morning.
 |
| I am soooo happy with the results this morning! |
I love it and you cannot beat free decor! You could add trim to these or a stenciled design or ribbon edge or whatever, the sky is the limit. Tracy (whom I had to text pics to immediately for her opinion of course) suggested a sheer curtain below or something. My initial idea was and still may be to remove the blinds and add a plain rolling shade or maybe a bamboo shade beneath. Something inexpensive of course. ;)

I'm just so happy that my house is starting to look like someone lives there and cares about what it looks like! lol One day soon I'll have to scan some old pics from when we moved in 8 years ago. It looks sooooo different. Keep an eye out for an update soon once I've finished all the windows.
Hope you like my little project!
Love
Holly
P.S. Here's an updated pic after I finished my second one using two sided tape. MUCH prettier (even thought it doesn't matter anyway...) and easier/less wait time. :D


0 comments